How do I add email to my Lovable app?
You built your entire app by describing it. Email should work the same way. Dreamlit connects to the Supabase project your Lovable app already uses. There’s nothing to prompt in Lovable, no API key to configure, no Edge Function to deploy. Tell Dreamlit what you need (“send a welcome email when someone signs up”) and it generates the trigger, template, and copy. Two clicks to connect, one prompt to create your first workflow.Because Dreamlit sits on top of your database rather than your app code, your Lovable credits stay focused on building features. Email lives entirely outside your Lovable project.
Why use Dreamlit instead of Lovable + Resend?
Lovable’s AI will wire up Resend if you ask. But a raw email API only covers delivery. Everything else (templates, scheduling, tracking, drip sequences) is still on you to build, and every feature burns more Lovable credits.| Challenge | With Lovable alone | With Dreamlit |
|---|---|---|
| Email blasts, recurring emails, and drip sequences | No easy way to send one-off blasts, digests, or drip sequences. You’d need to export user data to another platform, and there’s no good UX to understand or safely verify recurring workflows before publishing. | AI-powered workflow builder goes from prompt to end-to-end email workflow in seconds. Fully preview and test every step with live data before going live. |
| Full visibility | Dig through code logs to check if emails sent. Aggregate raw data yourself to understand performance. Email logic scattered across your codebase makes it hard to see your communication strategy. | Complete visibility into email delivery, performance, and workflow previews, all in one place. |
| Vendor lock-in | The more email infra you build in Lovable (edge functions, crons, webhooks), the harder it is to migrate away. | Decouples email from app code, so you can move your app’s infra to a different provider while keeping all email workflows intact. |
| Lovable credit usage | Every email feature you build burns valuable Lovable credits. | Offload email to Dreamlit so you can focus your credits on building your app. |
Who is this guide for?
- Lovable builders who want professional email without burning credits on infrastructure
- Vibe coders who’d rather describe what they want than configure SMTP
- Anyone on Lovable + Supabase looking to keep email decoupled from their app code
What do I need before starting?
- A Lovable app connected to your own Supabase project (not Lovable Cloud)
- 5 minutes
What if I’m using Lovable Cloud?
If you started with Lovable Cloud (their managed backend), you’ll need to migrate to use Dreamlit. Lovable Cloud doesn’t currently provide direct database access, which Dreamlit requires. Your options:-
Migrate to your own Supabase (recommended for production)
- Use our free, open source Lovable Cloud to Supabase Exporter to move your tables, users, and storage files to your own Supabase project. No password resets required.
- Use the hosted Lovable Cloud to Supabase Exporter on dreamlit.ai, or view the source on GitHub and self-host it if you prefer.
-
Start fresh with your own Supabase
- If you haven’t launched, this is the cleanest path
- Follow Lovable’s Supabase setup guide
-
Wait for Lovable to improve Lovable Cloud
- Lovable Cloud is a relatively new offering, so there’s a good chance they make it easier to access your database in the future
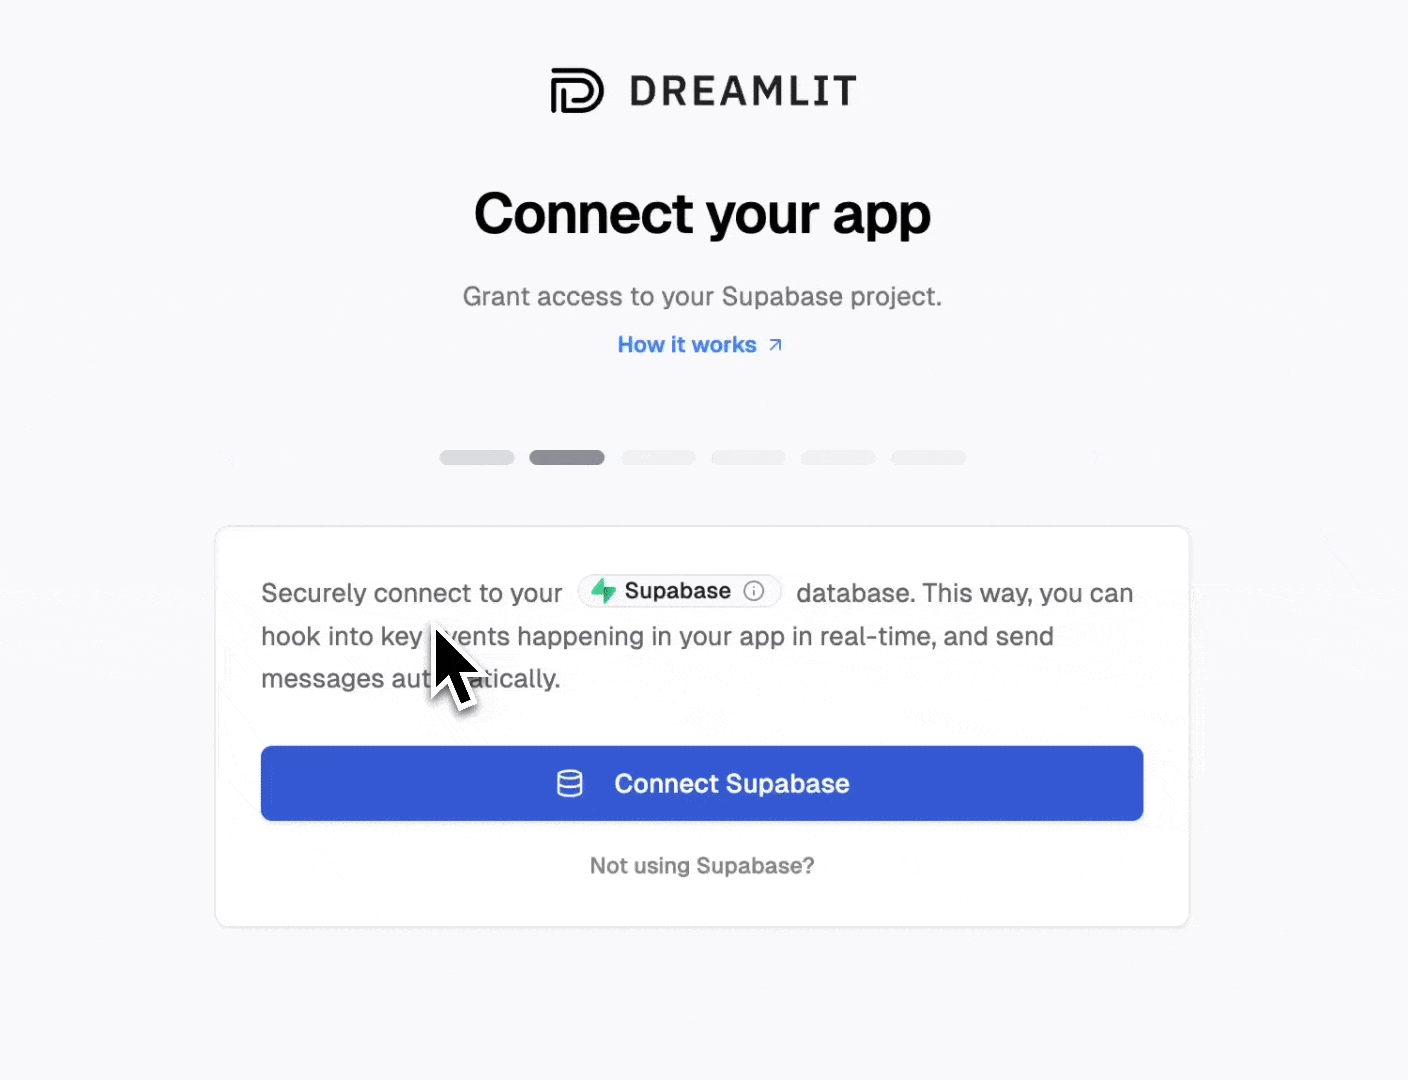
How do I connect Dreamlit to my Supabase?
Create a Dreamlit account
Go to app.dreamlit.ai and sign up.
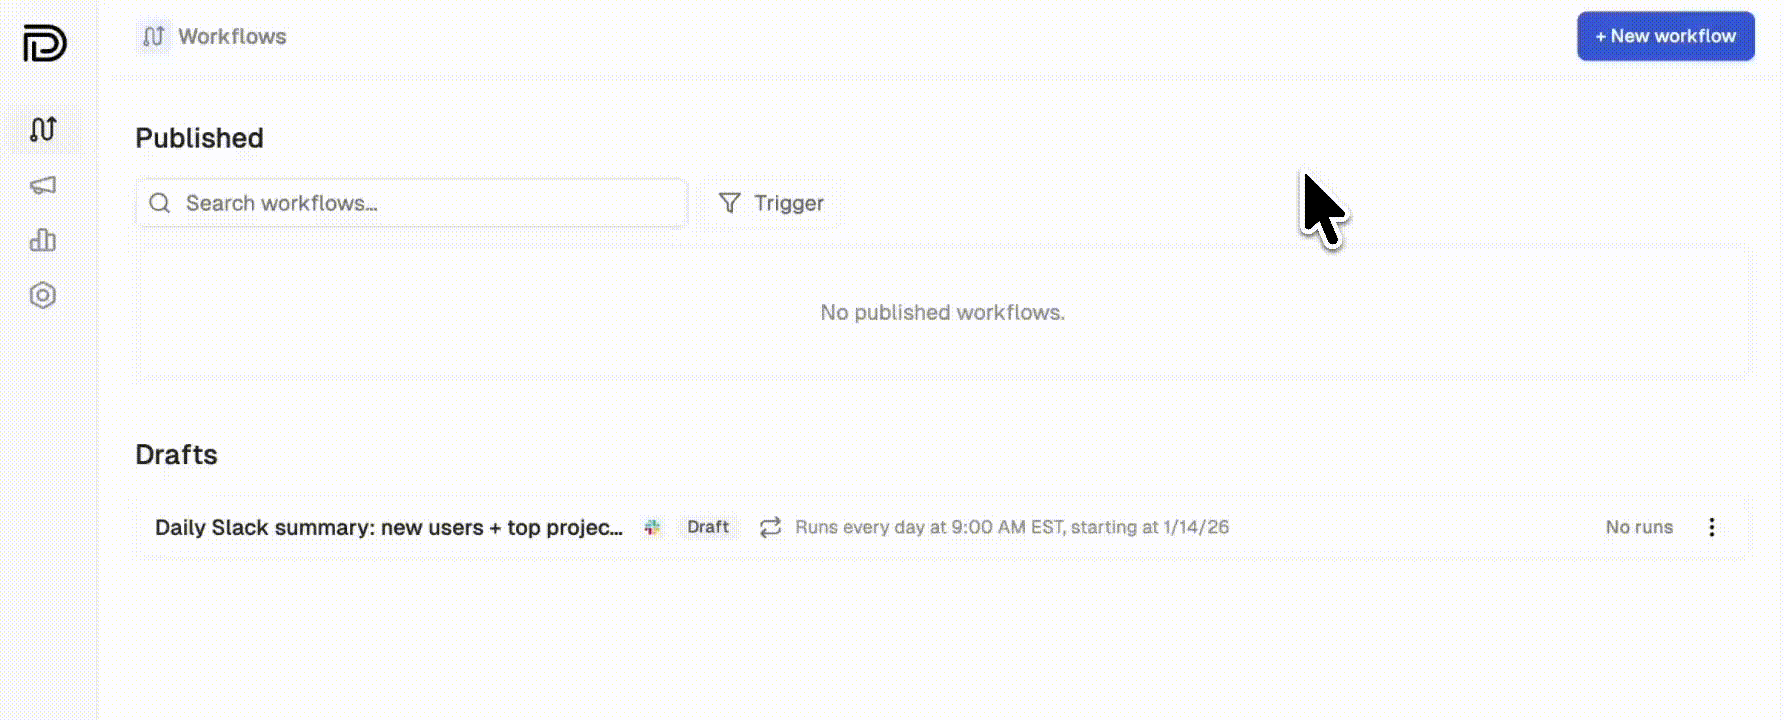
How do I create my first email workflow?
Here’s an example: setting up a welcome email that sends when a new user signs up.Step 1: Create the workflow or broadcast in Dreamlit
Click Create Workflow (or Create Broadcast) and describe what you want:“Send a welcome email when a new user signs up”The AI Agent builds you a workflow, end-to-end: from trigger, email template, and copy. No need to prompt anything in Lovable or configure anything manually in your database. Take a look at the preview and if all looks good, you can click Publish to take the workflow live.
Step 2: Update your Lovable app (if needed)
Chances are your database already stores the data you need to build your workflow. If not, and you need to add a field or table for Dreamlit to watch, simply prompt Lovable to persist the events or data you need (a good practice anyway so your database is the source of truth). For example:
“When a user clicks the Like button, add a row to the comment_likes table”
Or for something like order confirmations:
“When a user completes checkout, insert a row into the orders table with the order details”
If you’re using Lovable’s default user management (Supabase Auth), then users are automatically added to the
auth.users table when they sign up. No extra table needed.Step 3: Analyze workflow runs, email engagement, and optimize engagement
You can navigate to the Workflows page to check the status of recent workflow runs, inspect emails that went out as a result of those runs, as well as engagement metrics by recipient and workflow.How does Lovable work with Dreamlit?
Dreamlit triggers emails based on database changes. When prompting Lovable, focus on getting data into your database. Dreamlit handles the rest. Good prompts for Lovable:| You want… | Prompt Lovable with… |
|---|---|
| Order confirmations | ”Insert order details into orders when checkout completes” |
| Comment notifications | ”Save comments to a comments table with the post_id and author” |
| Activity alerts | ”Log user actions to an activity table” |
What other workflows can I build?
Any workflow that triggers on a database change. Check out our use cases for example prompts across welcome emails, order confirmations, reminders, internal alerts, and more.How do I send from my own domain?
By default, emails send from Dreamlit’s domain. To send from your own domain (likehello@yourapp.com), set up a custom email domain in minutes.
Add your domain
Go to Settings → Email Domains and click Add domain. Enter your domain (we recommend a subdomain like
mail.yourapp.com).Verify automatically
Dreamlit can automatically configure your DNS records for you. Just click Verify with your DNS provider, sign in to your provider, and authorize the changes.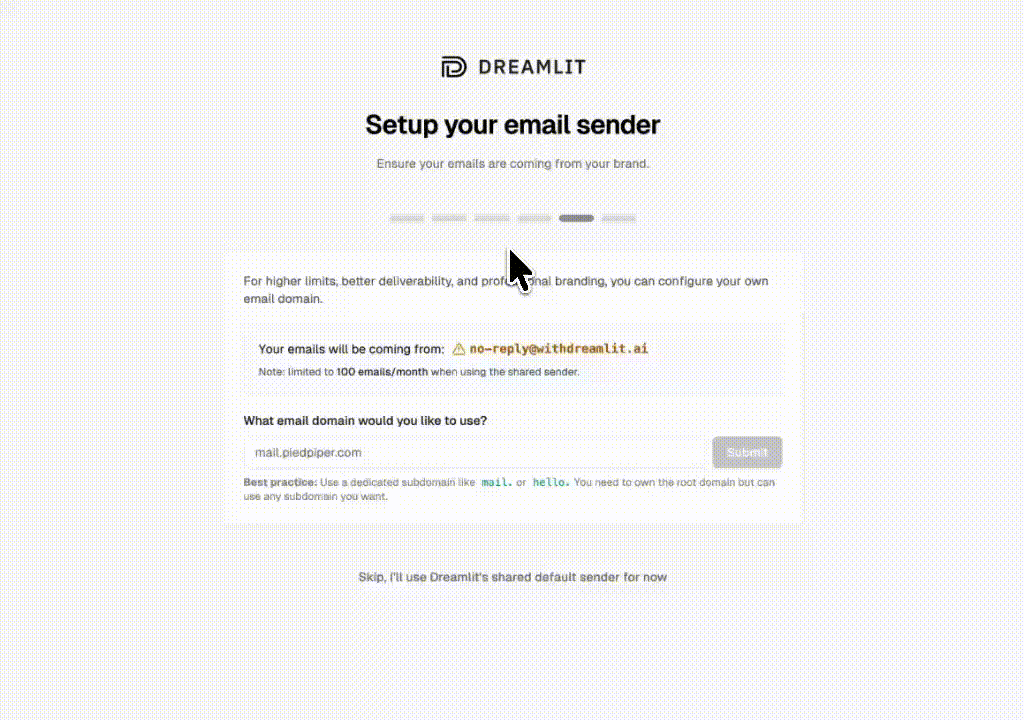
FAQ
What if I’m using Lovable Cloud?
Dreamlit needs direct access to your database, which Lovable Cloud doesn’t currently provide. Use our free Lovable Cloud to Supabase Exporter to migrate to your own Supabase project, or see What if I’m using Lovable Cloud? above for all options.Why aren’t my emails sending?
A few things to check:- Is your workflow published? Saved workflows don’t run until you click Publish.
- Is the trigger table correct? Lovable might have named tables differently than you prompted. Check your Supabase dashboard to see the actual table names.
- Is data being written? Check your Supabase dashboard to confirm rows are being created when users take actions.
- Try the preview. Use the preview to test with sample data and verify the workflow runs.
Do I need to change my Lovable app code?
Usually no. Dreamlit reacts to database changes, so if your app already writes the data you need, you’re all set. If you need to track something new (like order completions), just prompt Lovable to add the database write.Can I edit emails without re-prompting Lovable?
Yes. Your email workflows live in Dreamlit, separate from your Lovable app. Change copy, tweak templates, adjust triggers — all without touching your app code or prompting Lovable again.Can I send Slack notifications too?
Yes. Dreamlit supports Slack alongside email. Just describe what you want: “Notify our team on Slack when a new order comes in.” Learn more about Slack →How do I test without emailing real users?
Use the preview feature to send test emails to yourself with real data from your database. Your workflow won’t email actual users until you publish it.What if I’m already using Resend, SendGrid, or another email provider?
Dreamlit works alongside traditional email providers. Since Dreamlit takes a fundamentally different approach (database-driven, AI-generated workflows), you don’t need to migrate off your existing setup. Try Dreamlit for your next workflow and keep using your current provider for everything else.Next steps
Supabase Auth emails
Set up password reset, magic links, and more
Email domain setup
Send from your own domain
Use cases
More workflow examples
Get support
We’re here to help
References
- Lovable Supabase integration guide
- Lovable Cloud to Supabase Exporter (Hosted)
- Lovable Cloud to Supabase Exporter (GitHub)
- Supabase Auth SMTP docs
- Dreamlit use cases
Last validated: 2026-04-12