

Ready to get started? Reach out to
us. If we’re
a good fit, we’ll send you an onboarding link where you complete the steps
below.
1. Share your website URL (<1 minute)
We send an army of AI agents to understand everything publicly accessible about your brand: positioning, key features, pricing model, who you sell to, your industry, and everything your team has written. This is how the emails we write end up sounding like you. There’s nothing to install, and nothing on your site changes.2. Connect your data source (~5 minutes)
Dreamlit connects with a read-only user, the same way analytics/ETL platforms like Airbyte, Metabase, or FiveTran do. You can connect any Postgres database. This lets Dreamlit:- Build and diagnose your user funnel and key activation metrics.
- Hook into key events happening in real time to kick off email workflows, without having to bother your engineering team to instrument code.
1
Grant Dreamlit read-only access
To grant Dreamlit access, we’ll first need to spin up a dedicated database user. Run the following two SQL statements in your database, replacing
<SECRET_PASSWORD> with a strong, unique password:2
Share the connection string
When prompted during onboarding, enter your connection string with the password from above to securely connect.
PostgreSQL 14 or newer
PostgreSQL 14 or newer
Supabase, Neon, Amazon RDS and Aurora, Google Cloud SQL, and most managed
providers qualify.
Logical replication enabled
Logical replication enabled
This is the built-in PostgreSQL setting that exposes the change feed
Dreamlit reads, and the same setting analytics tools such as Fivetran and
Airbyte ask for.
A direct connection host
A direct connection host
Use your provider’s direct database host (typically port
5432), not a
transaction pooler host. Pooled connections cannot follow the change feed.3. Set up your email sending domain (~5 minutes)
You’ll want your emails to come from your brand/domain (for example, jane@mystartup.com). We’ve partnered with a service called Entri to make this seamless. In most cases, it’s an automated flow that only takes a couple of minutes: sign in to your DNS provider, approve the records, done. If you’d rather add the records by hand, or want to prepare ahead, see custom domains.Automatic setup (recommended)
Dreamlit can configure your DNS records for you. Just click Verify with your DNS provider, sign in to your provider, and authorize the changes.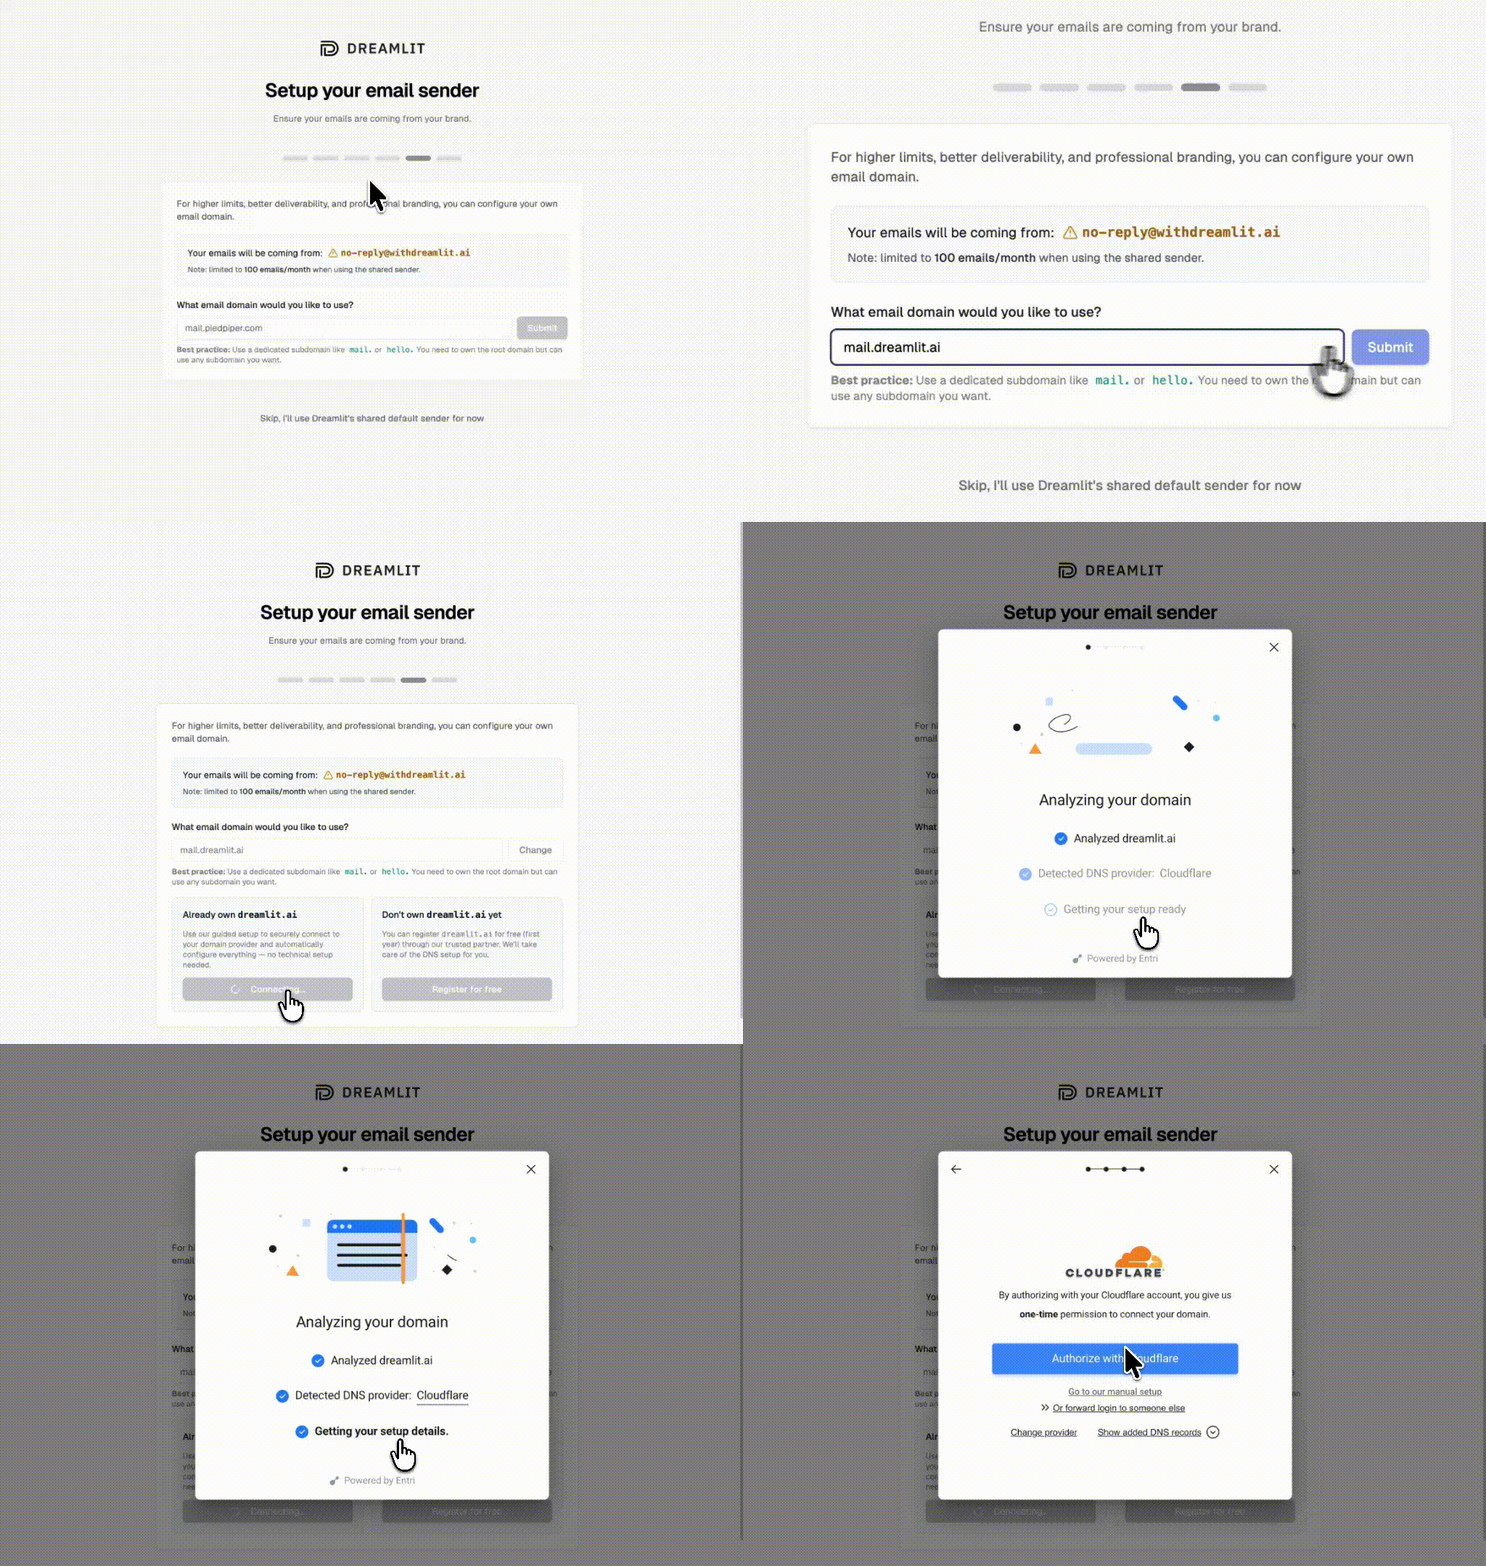
Automatic DNS setup—no manual records needed
Automatic setup is available for supported DNS providers. If your provider
isn’t listed, use manual setup below.
Manual setup
If your DNS provider isn’t supported for automatic setup, you can add the records manually. Dreamlit shows you exactly what to add.1
Copy the DNS records from Dreamlit
After adding your domain, Dreamlit generates the required DNS records (DKIM, SPF, DMARC). Copy these to add to your DNS provider.
2
Add records to your DNS provider
Log in to your DNS provider and add each record. Here are instructions for common providers:
Cloudflare
Cloudflare
- Go to the DNS tab in your Cloudflare dashboard.
- Add a new record for each entry shown in Dreamlit:
- Type: CNAME or TXT (depending on the record)
- Name: Provided by Dreamlit
- Value: Provided by Dreamlit
- Save your changes and wait for propagation.
GoDaddy
GoDaddy
- In GoDaddy, open the DNS Management page.
- Click Add under “Records.”
- Enter the record details from Dreamlit, including Host (Name) and Value.
- Save the record and wait for DNS propagation.
Namecheap
Namecheap
- Navigate to Domain List → Manage → Advanced DNS.
- Add each Dreamlit record in Host Records.
- Save records and wait for propagation (usually a few minutes to a few hours).
3
Verify in Dreamlit
Once you’ve added all the required DNS records, return to Dreamlit’s Email Domains page and click Verify next to your domain.
Troubleshooting: Verify your DNS records
Troubleshooting: Verify your DNS records
If verification fails, you can confirm your DNS records are set up correctly using these commands or a free DNS lookup service like MXToolbox.
Replace
Replace
macOS / Linux
macOS / Linux
mail.mydomain.com with your actual domain.Windows
Windows
mail.mydomain.com with your actual domain.4
Start sending
Once verified, select your domain when creating email workflows. Your emails will now come from your own brand.