> ## Documentation Index
> Fetch the complete documentation index at: https://notikaai.mintlify.site/llms.txt
> Use this file to discover all available pages before exploring further.
# Basics
> Get a foundational understanding of how workflows operate in Dreamlit.
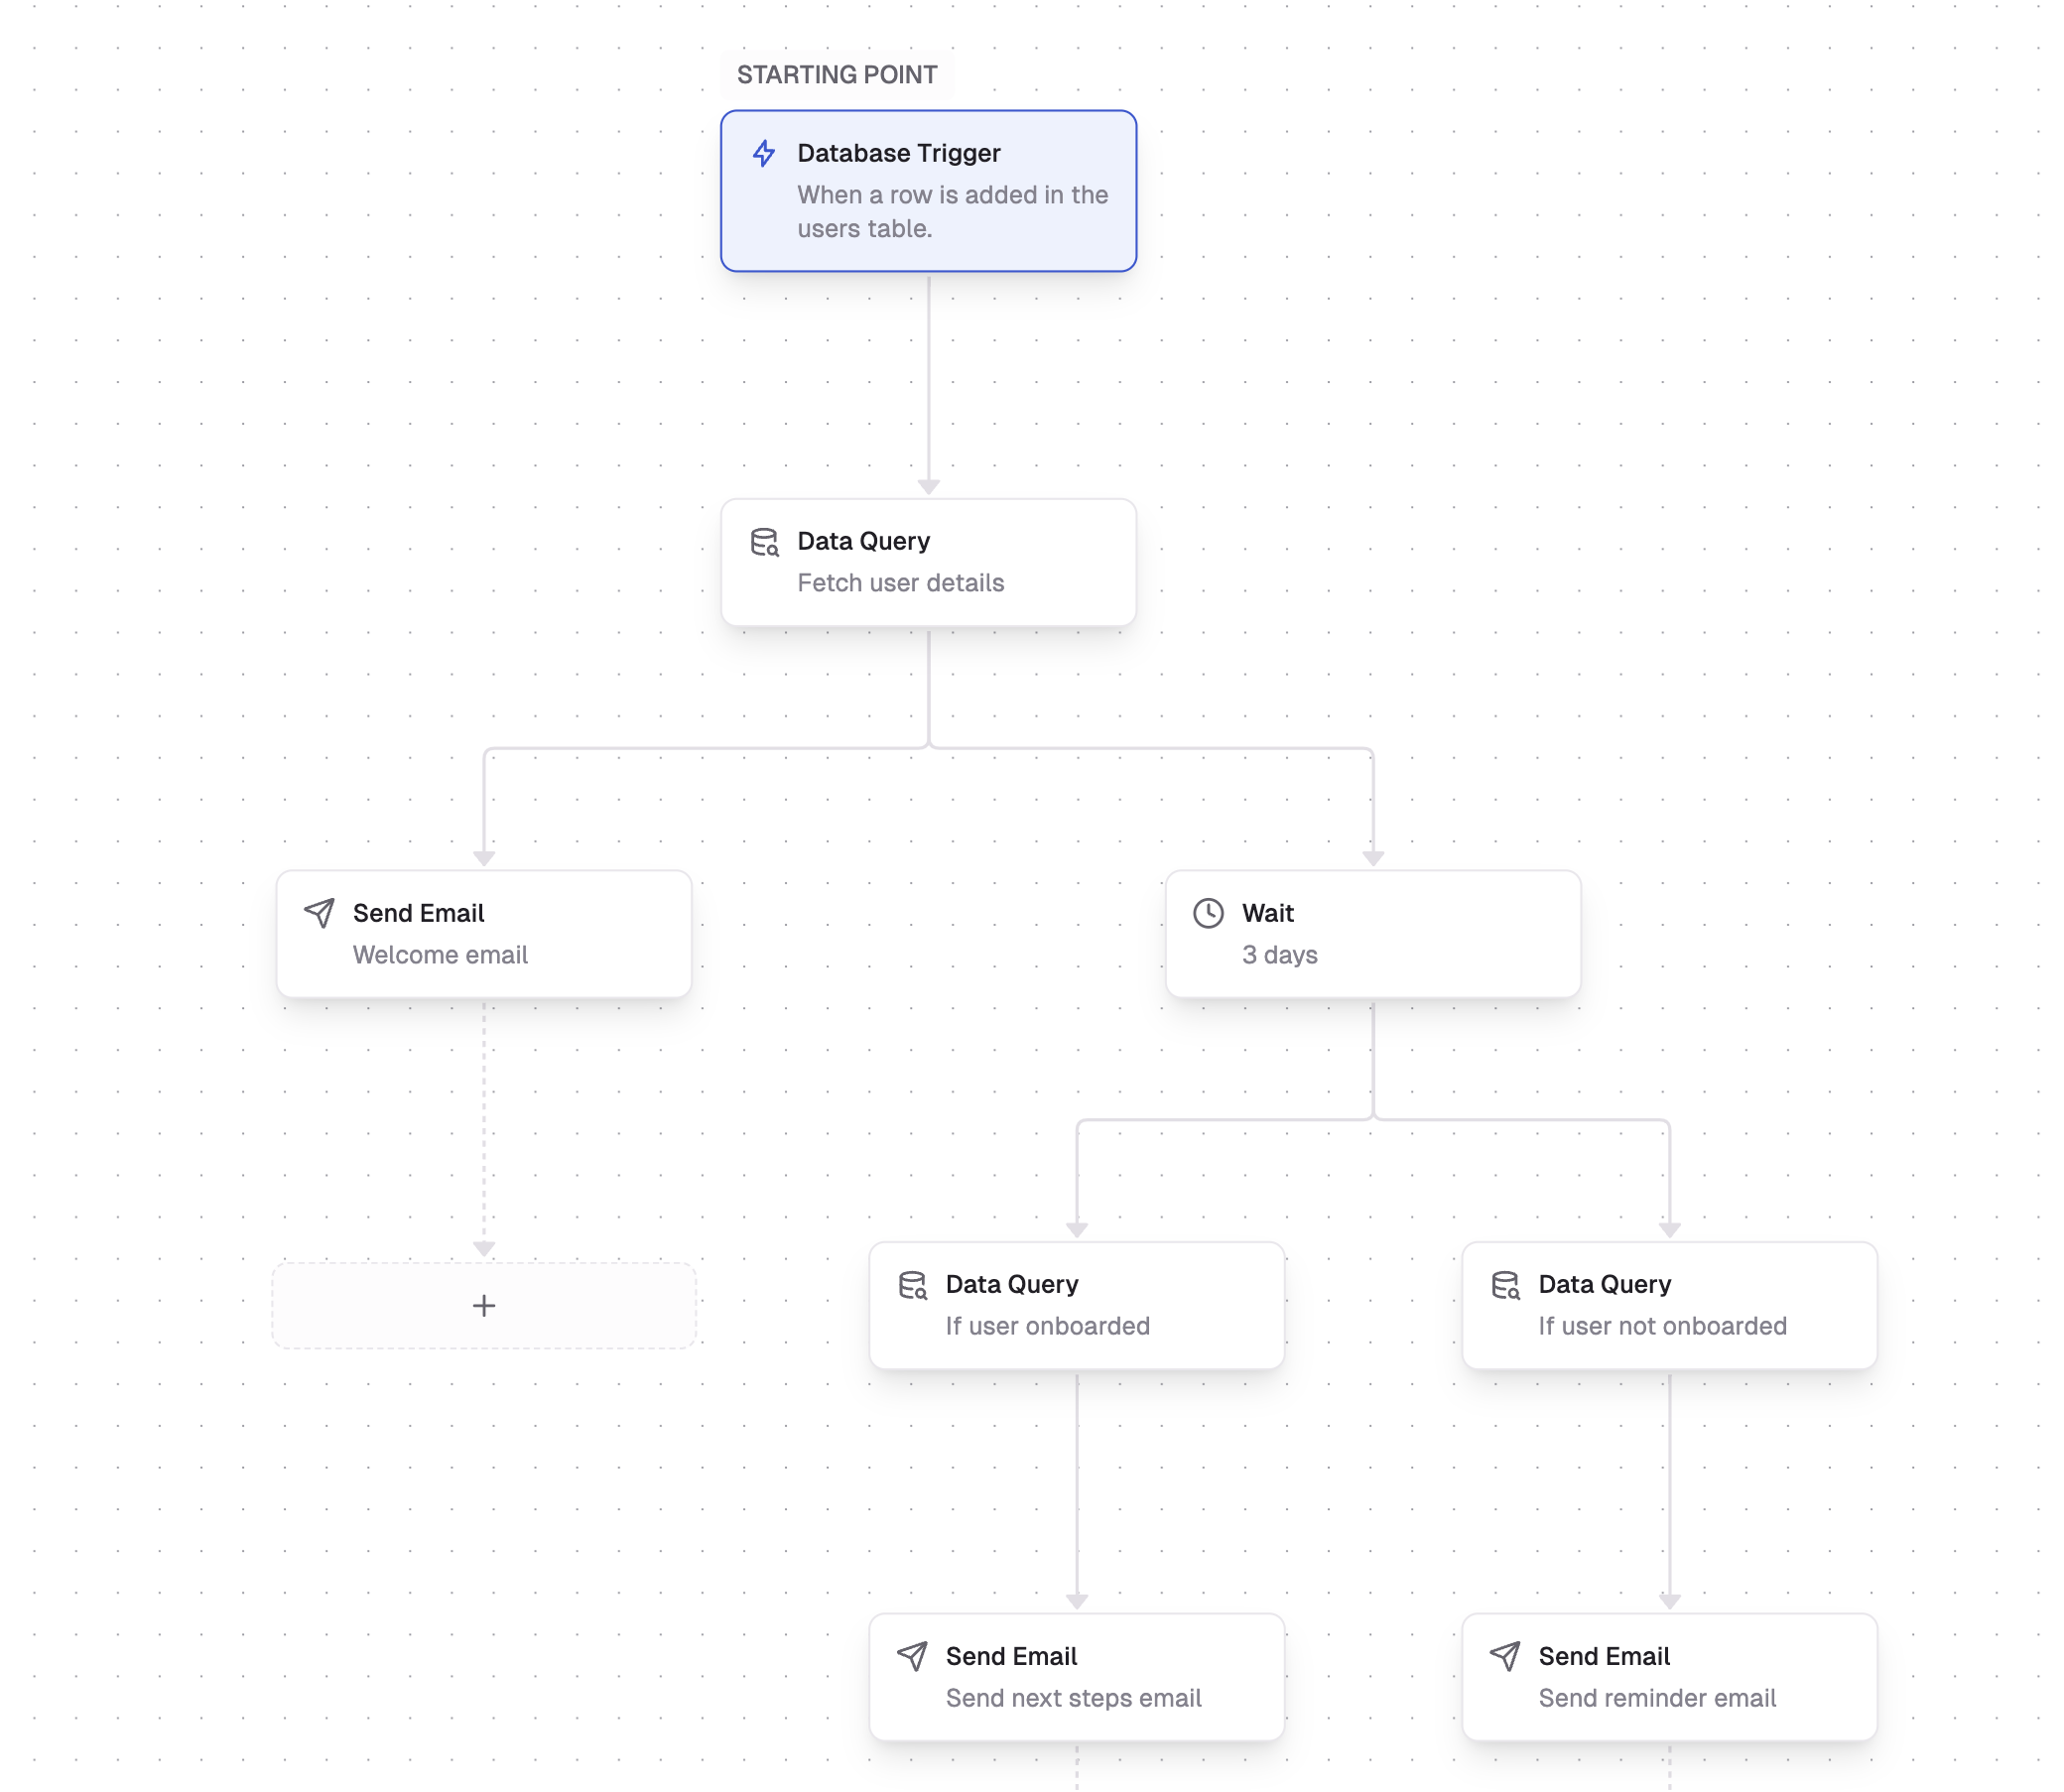
In Dreamlit, your **workflow** is a visual sequence of steps that runs whenever a triggering event occurs. These steps are chained together to process or transform data, orchestrate logic, and ultimately send out notifications.
 ## Data flow
Each step in the workflow receives **data** (often a single item, but potentially multiple items). For instance, if your trigger picks up a row from a database table, you'll get a single row as your initial input. You can then add more steps—like a [Data Query](/docs/steps/query)—to join or fetch additional data.
This means you can configure a single trigger event to fan-out to many (potentially thousands) of notifications, and Dreamlit will handle this for you. Use cases include:
* a comment is added to a post, and you want to notify all other commenters
* a message posted in a groupchat, and you want to notify all members
* an update is made to a listing, and you want to notify all subscribers
## Building a workflow
In the workflow builder UI:
1. **Start by selecting a trigger** (e.g., a [Database Trigger](/docs/steps/database-trigger)).
2. **Add steps** (e.g., wait durations, queries, Slack messages, email sends, etc.).
Every change is auto-saved. However, the workflow will not be activated until you click [Publish](/docs/workflow/publishing-workflows).
This means you can safely experiment with updating your workflow steps without worrying about messing with currently running workflows.
## Parallel branches
When you add a step, you can choose to add it either as a descendant or as a branch.
Each branch runs in parallel, meaning that a failure in one branch doesn't block the others.
```mermaid theme={null}
flowchart LR
A["Trigger: row inserted"] --> B["Wait 3 days"]
A --> C["Data Query"]
B --> D["Send Email"]
C --> E["Send Email"]
```
If a node in either branch fails, the other branch will continue to run. You'll see each branch in the Activity Log.
## Reliability
Dreamlit manages reliability behind the scenes:
* **Automatic retries**: Each workflow step is retried on transient failures with exponential backoff.
* **Idempotent**: Steps won't accidentally run twice for the same item.
* **Scalable**: Parallel branches can handle large fan-outs of data, running steps in parallel without overloading your application or your database.
## Next steps
That's the gist of building workflows in Dreamlit! Once you feel comfortable with the basics,
How to finalize your workflow so it starts running live.
Inspect and debug your workflow's steps in real time.
Learn about each type of step (trigger, wait, query, email, Slack, etc.).
## Data flow
Each step in the workflow receives **data** (often a single item, but potentially multiple items). For instance, if your trigger picks up a row from a database table, you'll get a single row as your initial input. You can then add more steps—like a [Data Query](/docs/steps/query)—to join or fetch additional data.
This means you can configure a single trigger event to fan-out to many (potentially thousands) of notifications, and Dreamlit will handle this for you. Use cases include:
* a comment is added to a post, and you want to notify all other commenters
* a message posted in a groupchat, and you want to notify all members
* an update is made to a listing, and you want to notify all subscribers
## Building a workflow
In the workflow builder UI:
1. **Start by selecting a trigger** (e.g., a [Database Trigger](/docs/steps/database-trigger)).
2. **Add steps** (e.g., wait durations, queries, Slack messages, email sends, etc.).
Every change is auto-saved. However, the workflow will not be activated until you click [Publish](/docs/workflow/publishing-workflows).
This means you can safely experiment with updating your workflow steps without worrying about messing with currently running workflows.
## Parallel branches
When you add a step, you can choose to add it either as a descendant or as a branch.
Each branch runs in parallel, meaning that a failure in one branch doesn't block the others.
```mermaid theme={null}
flowchart LR
A["Trigger: row inserted"] --> B["Wait 3 days"]
A --> C["Data Query"]
B --> D["Send Email"]
C --> E["Send Email"]
```
If a node in either branch fails, the other branch will continue to run. You'll see each branch in the Activity Log.
## Reliability
Dreamlit manages reliability behind the scenes:
* **Automatic retries**: Each workflow step is retried on transient failures with exponential backoff.
* **Idempotent**: Steps won't accidentally run twice for the same item.
* **Scalable**: Parallel branches can handle large fan-outs of data, running steps in parallel without overloading your application or your database.
## Next steps
That's the gist of building workflows in Dreamlit! Once you feel comfortable with the basics,
How to finalize your workflow so it starts running live.
Inspect and debug your workflow's steps in real time.
Learn about each type of step (trigger, wait, query, email, Slack, etc.).